Modern DIY repairs
What happens if an item breaks, do you throw it away or wonder if it can be repaired? As a tinkerer (and partially cheapass) I’ve made quite a few repairs in the last years which are not that common. Hopefully, this inspires you to repair more of your items.
Hammer, nails, duct tape and glue, and you used to be able to “fix” anything stationary in the old days. Modern times have brought us new repair challenges as the materials used are most often more complex than just wood, and many items contain some electric circuits.
Someone who is not familiar with the modern types of items might feel encumbered to even try to fix any modern issue eg. broken plastic parts or electrical devices not working properly. However, if you have tinkered with electronics lately or played around with CAD, you probably have a sense of how things work and how they can be fixed.
One thing that I have learned the hard way over the years is that the best way to learn is by failing. I’ve made several mistakes which have had their price. once I almost ruined a new parquet floor, and the last keyboard prototypes that I ordered had design faults so they didn’t work. No one likes making mistakes, but making them really teaches you to work differently.
Nowadays we have lots of tools that we can use for repairs. The internet is full of repair guides (eg. YouTube, ifixit), libraries (atleast in Finland) offer workshops where you can solder, 3D-print, laser-cut and work with fabrics and spare parts can be found on global sites like Amazon, eBay and Aliexpress, sometimes even from local hardware stores. Doing repairs is also cool from a sustainability point of view, less waste is always a plus.
Here are some of the items that I’ve fixed/repurposed and a little backstory about how I did them.
Car AUX port
Issue: The AUX-port wasn’t working anymore
Solution: Spare parts were not easily accessible and those were still quite expensive for what they were. 10€ for an AUX port is quite expensive. The issue was that the port had received mechanical stress from plugging and unplugging an AUX cable and hence lost contact between the female jack and the PCB. I was able to find the blueprint of the component and was able to solder some jump wires to fix the broken connection in the port.

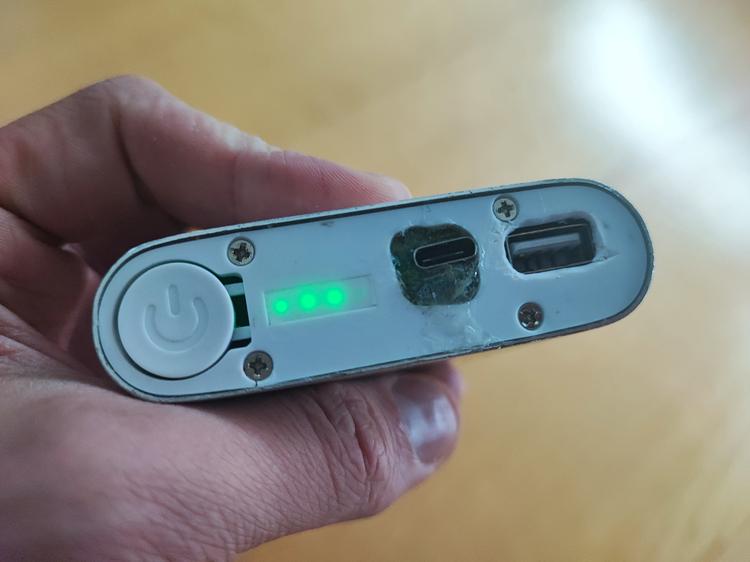
Battery bank charging port
Issue: The charging port had burnt and broken due to a bad USB adapter, and the power bank didn’t charge at all.
Solution: Replace the charging port with a new one. I happened to have a USB Type-C female port that I had used for debugging USB wires and thought it would be perfect for the power bank as it’s easy to solder wires to its pins. I took the power bank into pieces, ripped the old charging port away and soldered some wires to the super thing traces on the PCB. USB used to only require 4 wires (5V, d+, d-, GND) but as this was a charge-only port I decided to try it out firstly with just the power traces. To my surprise, it worked normally with only power attached, and because data wasn’t added I didn’t need to fiddle around with resistors. Several layers of 5-min epoxy and cocktail sticks made the final result much studier than the old one.
It does look a little funky but for me, the only thing that matters is that it works. The TSA at the airport did look at it for a while as it’s missing the CE certificate, but I haven’t yet had to discard it.
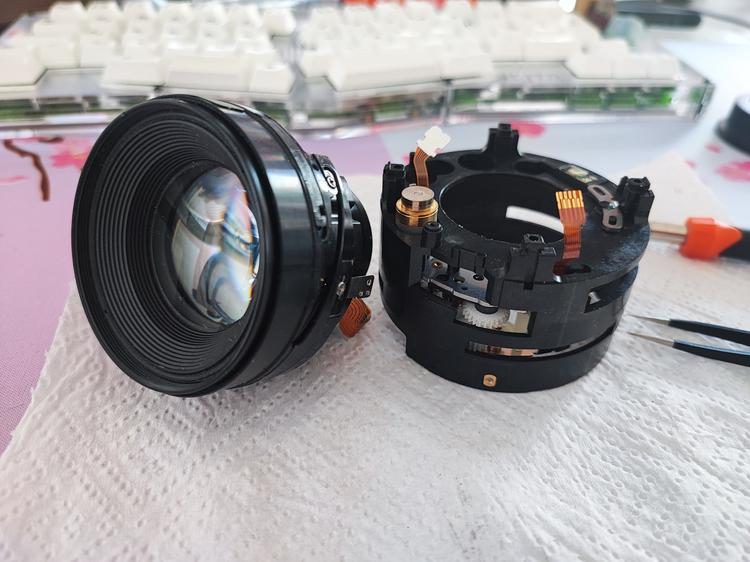
The broken camera focus ring
Issue: The camera had a design flaw in the focus ring. It is too thin making it warp really easily from a frontal bump.
Solution: I just followed one YouTube tutorial on how to fix the focus ring. I took the camera apart, cleaned the pieces with IPA, removed the focus ring and used some raw power to straighten it out, started reassembly with the addition of grease and got it quite quickly packed back together. Due to the relatively thick grease that I applied, the camera lens now works more silently than a brand-new one.
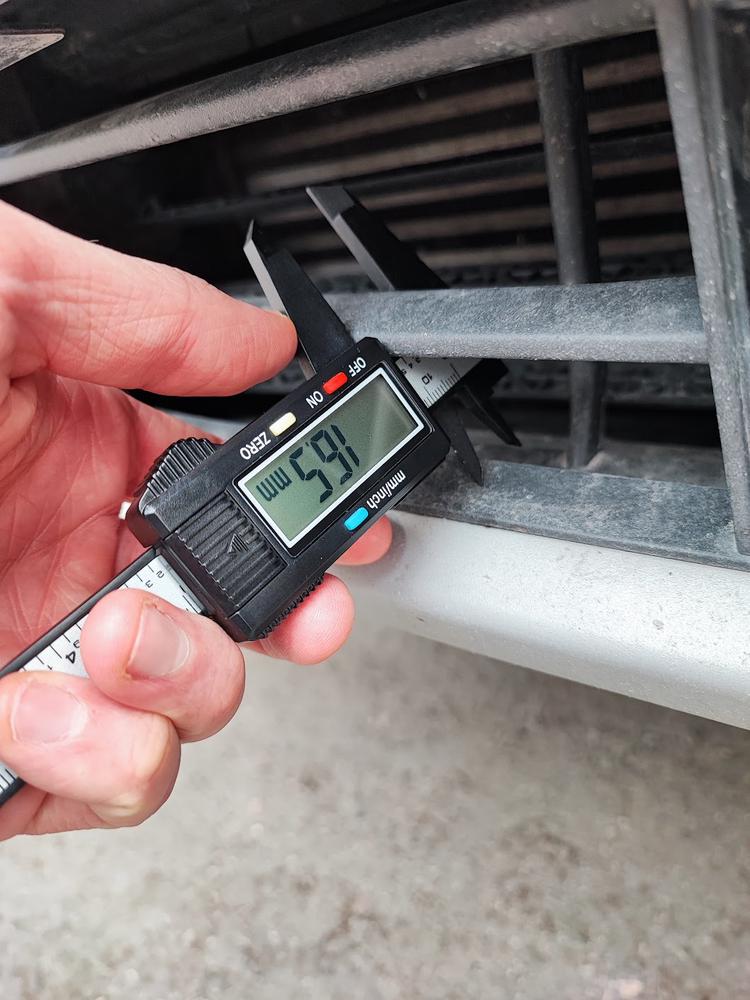
Car front grill
Issue: A acquaintance’s car had hit some snow wall when parking last winter and replacing the whole front grill would have been quite expensive. The issue was only cosmetic.
Solution: I took some measurements with a periscope and took the values to Fusion 360. I designed a part that would mostly fit in the broken slot but that could be slightly modified by sanding or using a Dremel. The part was printed as thick as possible from ASA by Hekeke. I thought I would also help out with the installation of the part (using epoxy) but my acquaintance was handy enough to do it himself and the end result was great! You cannot see the replacement part unless you stare at it. Also, wait till that part gets partially dirty/dusty and it blends in perfectly!

Mouse (Razer Deathadder) switches
Issue: Middle mouse click stopped working.
Solution: I ordered a new middle mouse click switch as well as new main switches for the mouse. After the mouse disassembly, I replaced all the switches with new ones. The mouse felt now just like new. I also added to the mouse some new rubber pieces as the old pieces had worn out. Sadly I didn’t take photos of the repair process…

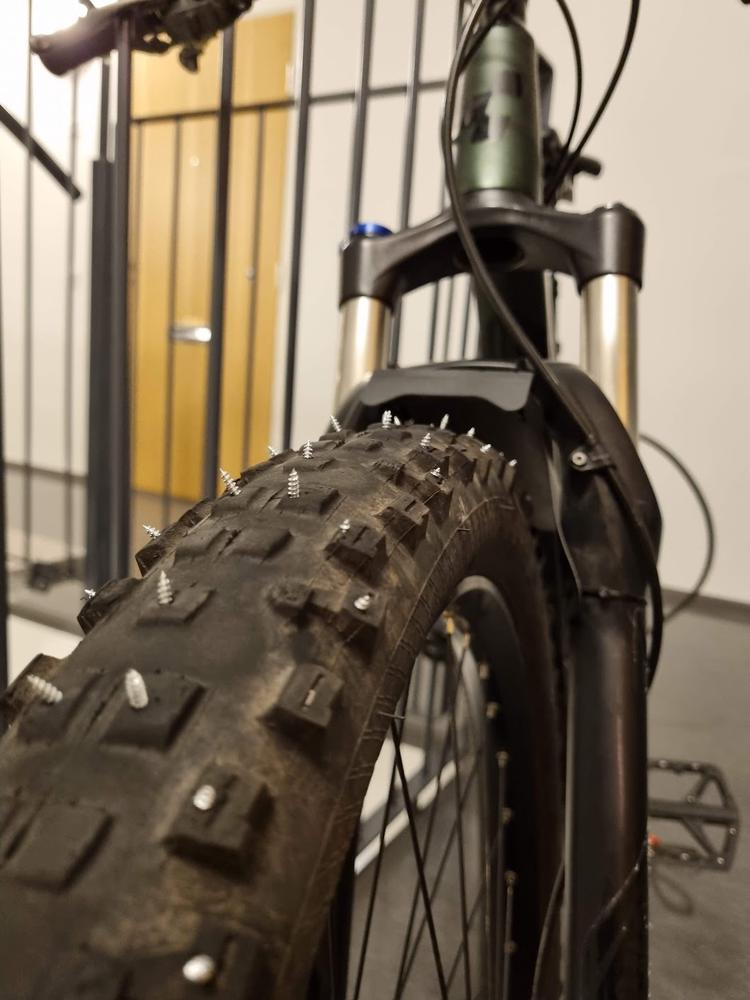
Repurpose worn-out mountain bike tyres
Issue: My mountain bike tyres were really worn out and didn’t have the necessary grip for rides in the woods.
Solution: I decided to turn my old tyres into spiked tyres. I bought the cheapest short screws from a hardware store and screwed them to the tyre pointing outwards. When done it looked like in the picture, Mad Max style.
It felt really weird to ride with these spikes. You had 10/10 grip on any terrain that those spides were able to dig into, however, on totally flat surfaces the tyres were quite slippery. The spikes provided maximum grip in most terrains but also made the bike much harder to pedal due to the increase in rotational mass and friction from the spikes. Despite that, it felt quite insane to be able to ride normally on an ice hockey rink and not slip.
I ended up shortening the spikes as they were a bit overkill as in the picture. One side-effect of the spikes was that I started having quite a few punctures but that was resolved by adding padding between the inner tube and screws.
Final words
There are many more things that I’ve fixed but here are perhaps the ones that I’m most satisfied with. I see broken items as an opportunity to learn something new and I get joy from getting more use of repaired items as well as appreciate the items more than previously since I’ve added my own touch to them.
Check my other posts
A Long-Awaited Update: Insights into the Last 8 Months of My Life
It's been a while since the last post on my blog. A lot of things have happened and there simply hasn't been enough time to give some love to my blog. Despite the turbulence, certain projects have actually progressed.
DIY whisky glass lid with Fusion 360 and 3D-printer
I found a really nice looking whiskey glass lid that was sold in the US. Buying that lid as a European would have caused high shipping and taxes so I decided on giving a shot creating the product by myself.