My keyboard journey from the beginning to this day
How I got into this silly hobby of mechanical keyboards and what I’ve learned over the years. I can tell you, mistakes teach well!
Satan GH60
My coworker inspired me to build my first custom keyboard. I saw little anxious over soldering but it turned out quite decent for a first keyboard.
PCB: Satan GH60
Switches: Gateron Brown
Keycaps: Some 20€ blank keycaps
Case: Some 10€ plastic case
I also added an RGB led-strip to the bottom of the keyboard. The case required some handling so that the strip would fit. Not sure if it was the lack of control or what, but I was never able to control the backlight, might have been due to the PCB.
Sadly the PCB of this keyboard died after about a year of use, the PCB started to behave unnaturally and finally died.

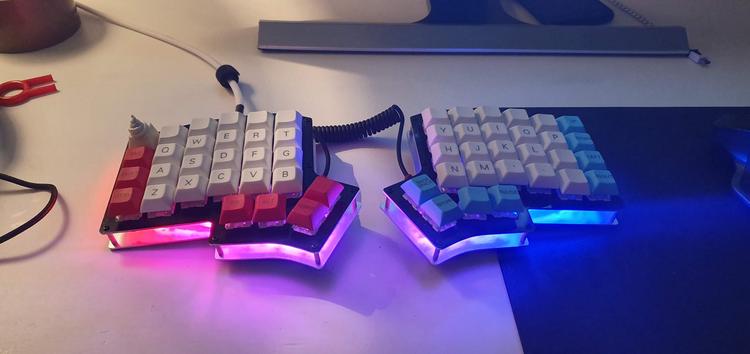
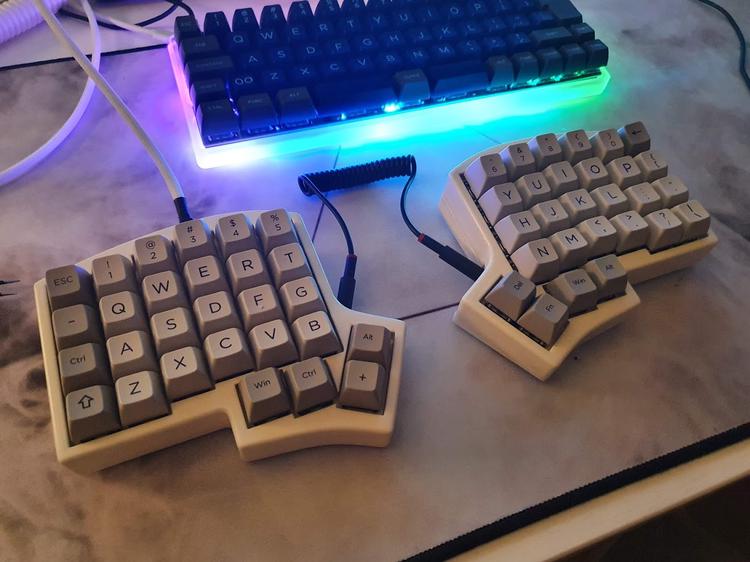
Iris Rev 2.5
My goal was to have an as RGB-keyboard as possible, being split and having clicky switches.
PCB: Iris Rev. 2.5
Switches: Kaihl Boz Jade
Case: Keebio aluminium plate-case
Keycaps: cheap DSA
This keyboard started to cause problems right from the beginning. As this PCB didn’t come with a built-in USB-port, you have to use a Pro Micro (atmega32u4 microcontroller) for both sides. I guess I was really unlucky with the quality of my Pro Micro as the Master ones USB-port fell off after a little use.
Desoldering switches is quite easy but desoldering a Pro Micro is not. Fixing this keyboard felt like a little burden but after a year or so I added new Pro Micros to it to both sides, this time with hot-swap-sockets so that I wouldn’t have to desolder another Pro Micro in case of an accident. Everything was fine but I never really got into using it.
Later on, I asked my friend to 3D-print me a case for the Iris as I wanted to bring it back to life. I got the printed parts and surface finished them by sanding and with paint. When putting it together in the new case, the slave side wasn’t working. Luckily my friend Hekeke lent me a multimeter so that I was able to debug the issue. I found the issue, added a jumper wire and put the case together. It was finally back alive!
I had also changed the switches to Gateron yellows, lubed with Krytox 205g0.
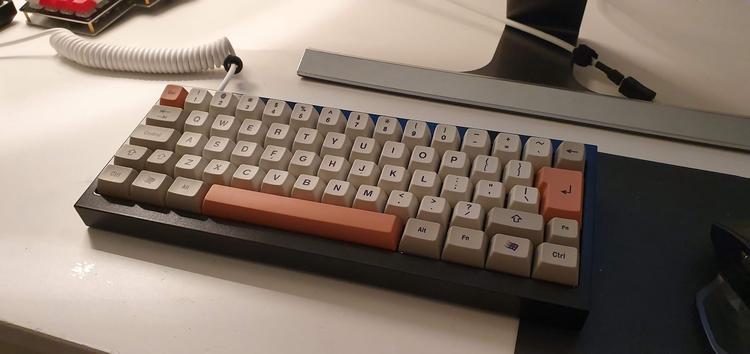
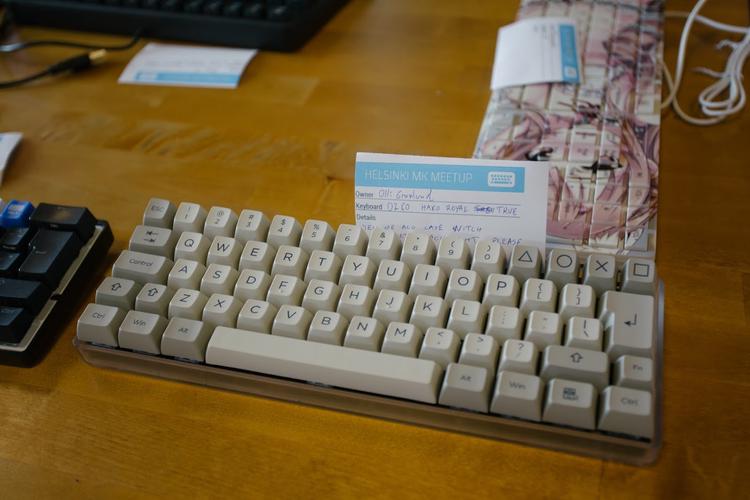
DZ60 #1
In the third mechanical keyboard meetup, I met a guy with this case and another guy with the keycaps, and it happened to be that both wanted to sell those parts. This is pretty much how my first DZ60.
PCB: DZ60
Switches: Halo True
Case: 4.6kg cast iron case
Plate: Brass plate
Keycaps: SA 9009
I’m in love with the case as it is really sturdy.
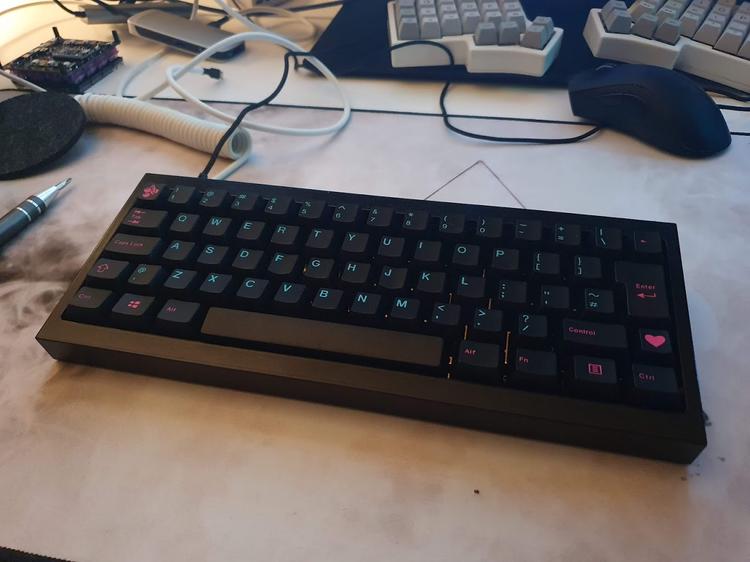
Switch swap
I was able to try out Durock T1 in a meetup and fell in love with the tactility and was impressed by the quality for the price. I eventually desoldered Halo Trues and replaced them with lubricated Durock T1.
Switches: Durock T1 lubricated with Krytox 205g0
Keycaps: EPBT Cherry Doubleshot Miami Night
Extra: Dampening foam between PCB and case.
This is my favourite keyboard so far. It feels really good and is really unique due to its case.
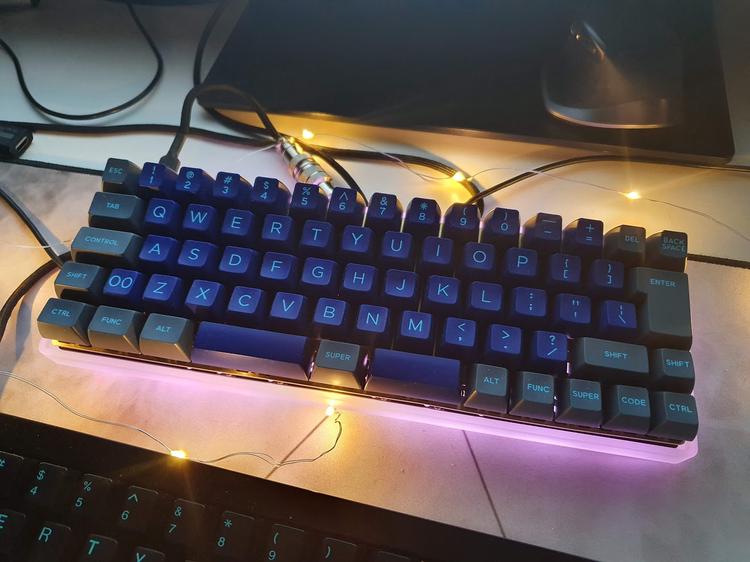
DZ60 #2
My goal was to create a hot-swappable keyboard so that I could more easily try out different switches.
PCB: DZ60
Switches: Hako Royal True
Keycaps: PBT SA Restor
Case: old Satan GH60 case
Extra: Mill-Max sockets for switches
I ended up having issues with the hotswap-sockets as they pushed the switches slightly up so that they weren’t anymore aligned with the plate-mounted stabilizers, this made space and enter-keys pop-up or not retracting up after a press. As if this wasn’t enough problems, the type-c port started having issues and finally losing contact.
This keyboard has made me question this hobby as everything went just wrong with this one. I’ve fixed the PCB and removed all hot-swap sockets and is waiting to be built someday.
DZ60 #3
I had seen a split spacebar in a 60% keyboard and I also wanted one, hence pushing me into making this
PCB: DZ60
Plate: Brass plate
Switches: Gateron Yellow lubed with Krytox 205g0
Keycaps: Domikey SA
Stabilizers: Durock
Case: Clear acrylic from KBDFans
This one turned really nice. I’m not the biggest fan of linear switches, but lubing Gateron Yellows makes them feel really good. This was my first perfect start-to-finish keyboard.
PRKL30
This was the first community project and serves mostly as a meme. I equipped the keyboard with some cheap low-quality keycaps, for now, + a DSA ISO-enter. I have still no idea how to actually work with this as all additional keys are behind some layer.
PCB: PRKL30
Case: Lasercut 3mm stacked acrylic
Switches: Durock Koala
Extra: Cheap plastic fantastic china knob
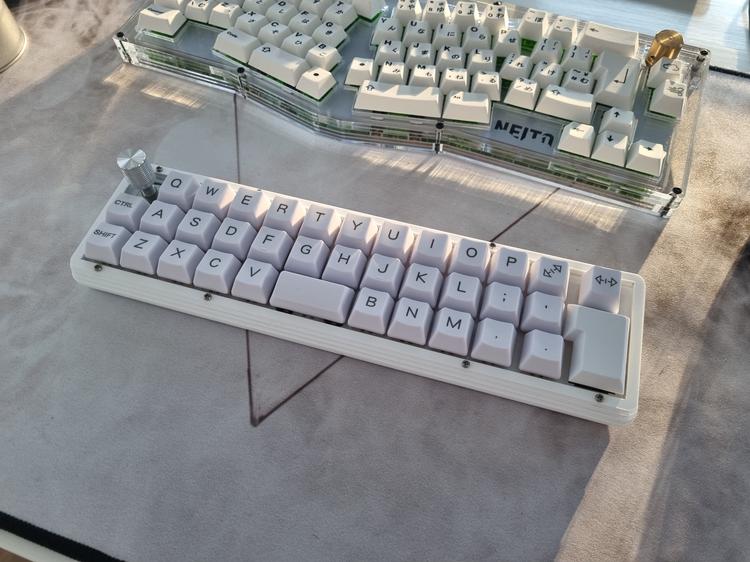
Neito
This is a TGR Alice-like keyboard but with an ISO-enter and support for a rotary encoder. The board I have is the first prototype and there is meant to be a group buy of this board. Read more behind the link!
See other keyboard-related posts
Neito Rev. 2 Collaboration Opportunity
I'ts been too long since Rev. 1, but sometimes life happens and things take longer than anticipated. Now, however, progression has happened!
Vortex Model M SSK kit review (Sponsored)
Review of the new Vortex Model M SSK keyboard Kit. Despite this being a sponsored review I'm allowed to give my honest opinion on the keyboard.
Vortex x MiTo Hellcat keyboard kit review (Sponsored)
Review of the new Vortex & MiTo Hellcat keyboard kit. Despite this being a sponsored review I'm allowed to give my honest opinion on the keyboard.