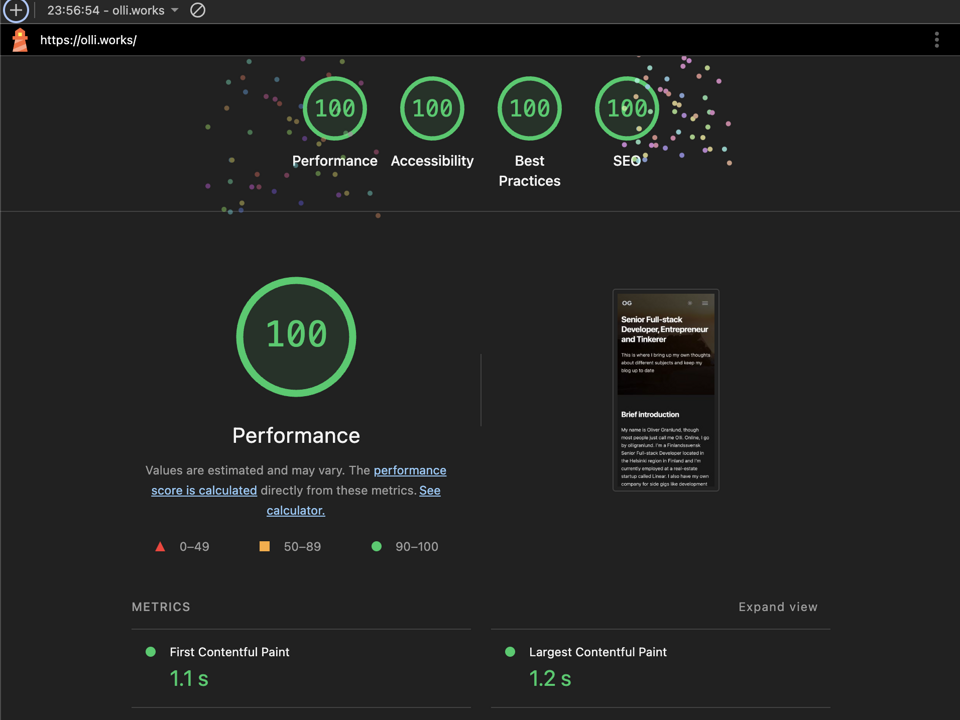
Website 2026 redesign
How I redesigned my Qwik website with GPT-6.1 Sol: ten design experiments, reusable blocks, and a lower Speed Index while keeping 100 Lighthouse scores.

My Wahoo KICKR CORE 2 came with a pair of Zwift Click v2 controllers. They worked well in Zwift and I quite liked having the shift buttons on the handlebars. When I tried MyWhoosh, the trainer worked fine, but the Clicks didn’t do anything. I figured it would be a fun little challenge to see if I could get them working myself.
I looked into how the Clicks worked and it seemed like they were using plain Bluetooth. I figured that if I could connect them to my PC, I should be able to see what they sent when I pressed a button. From there I could make a small app to handle the connection and turn those presses into something MyWhoosh understood.
Turns out MyShift, the virtual shifting feature inside MyWhoosh, already has keyboard shortcuts. K shifts up and I shifts down. If the app could send those keys when I pressed + and −, I could try the whole thing on a ride.
I put together a spec and a feature list for the coding agents and set them working. I kept the first version Windows-only. I wanted a way to find and connect the Clicks, see the status of each controller and watch the buttons light up when I pressed them. I also wanted a Diagnostics view where I could see if the app was getting button events over Bluetooth and sending the expected keys to MyWhoosh.
The basics were pretty much a one-shot. The Clicks showed up as connected, Diagnostics showed the signals I expected, and the gears actually changed when I pressed the buttons! For the interface I’d only told the agents how to lay things out. I hadn’t used any design skills yet, and I gotta admit it looked like a mix of Excel cells and MS Paint. With the buttons doing what they were supposed to, I could spend some time on how the app looked and felt to use.
For the next version I loaded up Taste Skill and UI UX Pro Max. I’d learned from my website redesign that it helps to be specific about what I want, so I asked for a coherent, modern UI with rounded edges, Tailwind 4 and a shadcn-style look. It still took a fair bit of back and forth to get there.
I made it easier to see which Clicks were connected and added battery readings to their cards. Even a quick tap now flashes on screen so you can see that it registered. I also added profiles so you can change what the buttons do. ZwiftBoard gave me some ideas for held keys and reconnecting the controllers along the way.
After a few more tests everything seemed fine, so I went for my first slightly longer ride with the app. At some point I went to shift down and nothing happened. The left Click had stopped working!
The funny thing was that the left Click still showed up as connected. I went back to Diagnostics. The + on the right showed up every time I pressed it. On the left, I could press − and see absolutely nothing. There was no button event for the app to turn into a key press.
I found a clue in BikeControl’s source code. The left Click v2 can stop sending button presses unless it’s been unlocked by connecting it in Zwift. BikeControl’s write-up on the Click v2 puts that unlock at about 24 hours. The right Click works without that step, which explained why it kept shifting up.
With keyboard controls I could try the same workaround BikeControl uses and restart the left Click on a schedule. I gave it a shot and got both controllers sending button presses after letting them sit idle. It’s a bit of a dirty fix. If you happen to press − while the controller is rebooting and reconnecting, that shift is gone. I left the restart option off by default.
I also tried OpenBikeControl to see if I could send shifts to MyWhoosh over the local network. It could make the app easier to bring to other platforms since sending keyboard input works a bit differently on each system. I got the network connection working in a test, but I never got OpenBikeControl fully working with MyWhoosh in this release. I’ll look into it again and see if I can get it working. Feel free to chip in :)
In the end I already had another button right there. I mapped B on the right Click to MyWhoosh’s I shortcut and went for a ride. + and B did exactly what I wanted. B normally means Back in BikeControl, and its right-side-only setup also remaps it to shift down.
I made that mapping part of ClickToWhoosh’s default profile even with both Clicks connected. Both B on the right and − on the left send I. When the left one goes quiet I can just keep shifting with the right one. For my own training that’s plenty. I’d call that a success for a quick little project!
For now I’m focusing on Windows, which is where I’ve tested the shifting on a ride. The portable x64 beta is unsigned, so Windows may show a warning when opening it.
Download for Windows (x64)View the GitHub repoIf you try it on your own setup, let me know how it goes on GitHub. I’m curious how the left Click behaves for others, especially on longer rides.
How I redesigned my Qwik website with GPT-6.1 Sol: ten design experiments, reusable blocks, and a lower Speed Index while keeping 100 Lighthouse scores.
I finally visited Nagu Distillery's new premises and got to see and taste our shared whisky cask for the first time.
Phase two of the site refresh: QwikCity tested and scrapped, Tina visual editing in Astro, LLM benchmarking, further image optimizations, and a drafted search feature.